3 Pointers When Filming Time Lapses
The ordinary becomes extraordinary when the parameters and boundaries of time are changed. When time speeds up everyday life, it becomes intriguing. Patterns become visible that weren’t detectable to the normal eye viewing the world in real-time.
So what is it exactly, that fascinates us about the ability to speed up time? Perhaps its the ability to see things in a new light that aren’t possible when watching in real-time. Time lapses are extended clips of video, remastered with a shorter duration in order to alter the look and speed of life. Some of the more common time lapses are of clouds, water, buildings being built, traffic, stop lights, and cityscapes.
With any modern camera that shoots video, it is possible to achieve this phenomena simply by pressing record for a specific amount of time and then in a non-linear editing program, speed up the footage. While this makes it simple, there are still several aspects that can be, and are easily overlooked when producing a time lapse. These pointers may sound trivial, but after spending half an hour, two hours, 3 days, ora week with your time lapse, you’ll want to be sure you have checked everything, including these three tips.
Check the Glass:
Before pressing the record button on your DSLR, or pro consumer camera, one of the easiest ways to blow the whole shot is to fail to notice lens dust or water spots on the camera lens. Personally, I have noticed that lens spots show themselves to be more prominent when filming bright clouds against blue skies. The particular reason is without the proper neutral density filters in place to lower the light intake by several stops, the only other easy solution is to close down the aperture, minimizing depth of field and allowing more of the shot to be in complete focus. With that, any water spot on the lens is amplified because it is in such sharp focus, and usually clouds on a blue sky have such contrast that its easy to spot lens distractions. So before beginning your time lapse shoot, be sure to clean the lens and double check your target of focus.
Remove Distracting Artifacts
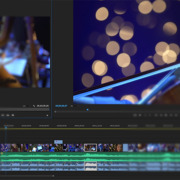
After filming your time lapse and imported into your software editing choice, such as Adobe Premiere Pro, or Divinci Resolve, one of the easily overlooked steps is to remove frames that have random artifacts in it. Scrub through your footage before increasing the speed to check for airplanes, if you are doing a cloud time lapse, bugs, or birds that have flown across the screen, or even the occasional person who walked through your scene. When the footage is sped up, all that is really happening is that the program determines that a certain number of frames must be deleted in order to make clip play faster, increasing the speed. So, by removing the artifacted frames before speeding up the footage, no noticeable jump cut will appear in the footage.
Anticipate the Lighting
While this can be tricky to account for, when shooting a video time lapse that spans for over 30 minutes to an hour, the lighting conditions can change drastically, especially shooting near dusk, such as a sunset, or even a sunrise. To avoid over exposing your footage or severely under exposing your footage, use a lens that has a “de-clicked” aperture ring so the lighting can be controlled manually without interval light changes from stopping up or down on the aperture ring. This will save hours of headaches fixing the lighting in post animated masks and lighting levels to account for drops or increases in natural lighting.
These aren’t earth shattering tips that will make or break a time lapse shoot, but these are things I have noticed as I have gone about creating them. It truly is fascinating to watching life speed up and see how it changes the dynamics of one’s perspective. It takes time, but it’s always worth it.


it was so amazing . thanks because u shared it .